a food snuggery

Peanut Butter Banana Muffins

I made these in a pinch this week when I did not have any breakfast to feed Jude. He still got his banana fix, but in the form of muffins instead. I was going to make my other banana nut muffin recipe, but I was completely out of butter, so I decided to experiment a little bit. I served the muffins with a little bit of peanut butter to entice my toddler to try them, but they are good served plain as well. In the recipe, I used crunchy peanut butter, to give the muffins a little more peanut butter flavor/crunch, but creamy would be fine. I bet these would be good with a chocolate chip or maybe even peanut butter chip addition, but I have not tried that yet!

peanut butter banana muffins

PEANUT BUTTER BANANA MUFFINS

2/3 cup sorghum flour

2/3 cup tapioca flour

2/3 cup brown or white rice flour

1/2 cup lightly packed brown sugar

2 teaspoons of baking powder

1 teaspoon of xanthan gum

2 Tablespoons of vegetable oil

1/2 cup crunchy peanut butter

3/4 cup milk, milk substitute, or water

2 eggs

1 teaspoon vanilla

1/4 teaspoon cinnamon

3 bananas, mashed

1/4 teaspoon of salt

Serve with peanut butter if desired

DIRECTIONS:

Preheat oven to 375 degrees. In a medium bowl, whisk together the flours, baking powder, brown sugar, cinnamon, xanthan gum and salt. In a separate bowl, mix mashed bananas, oil, eggs, peanut butter, milk, and vanilla. Pour the liquid ingredients into the dry and mix until just moistened. Pour into muffin liners in a muffin tin. Bake for 13-17 minutes or until a toothpick comes clean.

Makes 12-16 muffins.

peanut butter muffin bites

Jude’s little muffin bites


Add This AddThis Feed Button

Pumpkin Chicken Enchiladas

I have made these enchiladas for a couple years now. When I went through my “how many ways can I make enchiladas phase” I tried to find a recipe for pumpkin enchiladas and came across this recipe by Martha Stewart. Funny enough, tonight when I googled “pumpkin enchiladas” I came across several other bloggers who have made this very same recipe and loved it, so it is definitely tried and true. Anyway, this recipe is one of my favorite ways to prepare chicken enchiladas, so it has earned its place on my fall menu rotation. Don’t be turned off by the pumpkin sauce because it really does well as the base for this enchilada sauce. And besides, pumpkin is very nutritious. Here is Martha’s recipe with just a few minor adjustments.

pumpkin enchiladas

PUMPKIN CHICKEN ENCHILADAS

8 corn tortillas (the corn flavor goes really well with the pumpkin, I promise)

a few tablespoons of cilantro (I subbed this for the 6 scallions, diced-sometimes I add both)

leftover chicken, shredded (maybe a pound)

optional: roasted green chiles, chopped small

6 oz. of white sharp cheddar cheese, shredded

Sauce

1 can of pumpkin puree (15 oz)

3-4 cloves of garlic, peeled

1 jalapeno (remove seeds and membranes if you don’t need extra heat)

1 teaspoon chile powder

1/2 teaspoon cumin (I added this too)

2 teaspoons of salt

1/4 teaspoon of pepper

1 1/2 cups of chicken stock or water (I use chicken stock instead of water because I typically boil a chicken for this recipe)

DIRECTIONS:

Preheat your oven to 425 degrees. In a blender, puree pumpkin, jalapeno, chicken stock, garlic, chile powder, cumin, salt, and pepper. Place 1 cup of this sauce in the bottom of an 8 inch glass casserole dish. In a bowl, combine shredded chicken with green chiles, cilantro, and/or scallions and season with salt and pepper. Place some of the chicken mixture on each tortilla and then lay the tortilla seam side down in the casserole dish. Pour the remaining sauce over the enchiladas. Top with cheese. However, if you are casein-free, this recipe is fine without cheese. Martha recommends placing your casserole dish on a baking sheet in the oven to prevent any spills. Bake for 20-25 minutes until cheese is melted and casserole is bubbly.

Serves 4 alone or possibly 6 with sides

Note: These enchiladas are not spicy/hot to me, as Martha’s recipe title suggests, but then again, maybe I am hardened from years of eating spicy food. I have a different recipe for spicier enchiladas that I will post some time in the future, for those of us who like it hot. If you have any leftovers, it is spicier the next day!


Add This AddThis Feed Button

Gluten Free Menu Swap- October 8th

I would like to invite all my gluten-free friends to an exclusive menu planning session every week. I think it is a wonderful way to encourage each other’s recipes, ideas, and gluten-free cooking feats! After a bunch of us started posting our menu links every week over at Organizing Junkie, Mrs. G.F. and I decided it would be nice to also have all the gluten-free menus in one place.

and so Gluten Free Menu Swap begins.

Gluten Free Menu Swap

The idea is to create a resource for all of us asking the question, “What’s for dinner this week?” Since this can be a challenge when you are gluten-free, I think it will be fun to look at everyone’s menu to see what everyone is cooking (and just think of all those recipes!) and perhaps even find out which restaurants we eat gluten-free.

How it Works

Come up with your gluten-free menu of the week with at least Monday-Friday offerings. On Monday morning or earlier, email the host your post link. Sometime on Monday, the host will post the roundup and the ingredient everyone will be cooking with the next week. I should note, that cooking with the ingredient is completely optional, added in for my amusement, fun. This ingredient can be pretty much anything of the host’s choosing. I will be organizing the Gluten Free Menu Swap from this page. I will post and update a list of the hosts. I will also post links to past menu roundups.

Participating

1. If you would like to participate, simply email your post link to the host on Monday morning (or earlier) and he/she will add you to the roundup.

2. Link back to the host in your menu once he/she posts the roundup.

3. Optional: Grab a tag for Gluten Free Menu Swap (or make your own) and put it in your post.

Qualifying to host

1. It is is as simple as having one previous menu post and sending an email to natalie(at)glutenfreemommy(dot)com. I will add you to the list.

I think this would keep everyone linked (figuratively and literally). I hope everyone will participate because I think these menus really help! And if they are helping me, I bet they can help the newly gluten-free too! Even if you are going to be on vacation, really busy, or eating out let us know how you are eating! P.S. You do not need to be a gluten-free food blogger to participate, but you must be gluten-free! Here is the link to the page on my sidebar- I will update who is hosting here. Next week I will be your first host. Email me at natalie(at)glutenfreemommy(dot)com if you want to be put on the list to host. The only rule is that you must have at least one previous gluten-free menu up.

My Gluten-Free Menu of the week!

Monday: Leftover Pot Roast, Veggies, served over homemade horseradish mashed potatoes

Tuesday: Cajun Rice Quiche with Salad or Soup

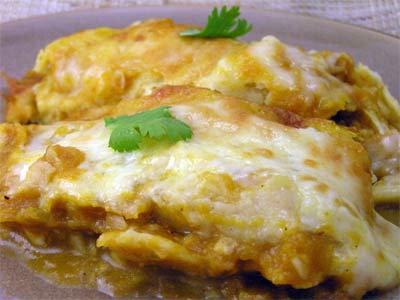
Wednesday: Pumpkin Enchiladas

Thursday: Roasted Vegetable Spaghetti with Salad

Friday: Ginger Chicken Stir Fry

And as you know, I usually do baby pictures on Monday, so I can’t forget my picture of the week. This would also be a clearly optional part of Gluten Free Menu Swap.

How cute are those ears?

And let us not forget his older brother, Jude. He is in his natural habitat [the outside] rockin’ the camo pants.

If you have a gluten-free menu this week, let me know by email or in the comments and I will link to you!

Karen’s Menu at Gluten Free Sox

Mrs. G.F.’s Gluten Free Menu

Mary Frances’ Gluten Free Menu at Gluten Free Cooking School

For those who choose to participate in the Gluten Free Menu Swap next week, I encourage everyone to cook something with basil.

P.S. Don’t forget to join Mrs. G.F.’s gluten-free recipe ring and go check out Gluten a Go Go’s Baking Bonanza from last week!


Add This AddThis Feed Button

Cilantro Pesto Grilled Cheese Sandwiches

Some of us loved to eat and cook before going gluten-free and some of us did not. I think if you were a foodie prior to going gluten-free that presents a different set of challenges/emotions than if you were not. If you were a foodie than you are both excited and devastated at the diet challenges ahead. I mean, is a gluten-free brioche still a true brioche? Well, I think it is. But I might have thought I would never eat true brioche again once upon going gluten-free.

If you were already a foodie you tried to find fruits, vegetables, and herbs in peak season and cooked them well. You already tried to find organic grass-fed beef, free-range chicken, or tofu. So as a foodie, you were already armed with knowledge that would help you on your gluten-free journey whether or not you realized it.

Since the typical American diet is loaded with processed foods that include many starches and few fruits and vegetables, the gluten-free diet really is a hard transition if you primarily ate convenience foods prior to going gluten-free. I do not think it is advisable to simply replace the gluten-laden processed food with gluten-free processed food. This will be hard on your pocketbook and your waistline, not to mention depressing. It is important to start learning about fresh foods; and honestly, someone has to learn to cook.

I get emails now and again from the newly gluten-free surviving on Amy’s frozen foods (I have been there believe me), begging me for recipes that are quick and easy. And I think to myself, it is time to get motivated, renew your “friendship” with food and get yourself in the kitchen. After all you it will be harder to heal if your desire is to simply heat something up or go out to eat all the time. I challenge all the newly gluten-free to become “foodies” and get back in the kitchen. It really will make you feel better. A brownie made with rice flour is still a brownie. You may not even be able to eat just one. So, this post is dedicated to the newly gluten-free who might be learning to cook for the first time. Let’s rediscover the grilled cheese sandwich together, shall we? I am adding a little cilantro pesto to mine.

gluten free cilantro pesto

CILANTRO PESTO

1 cup packed cilantro

2-3 Tablespoons olive oil (or to taste)

1/4 cup almonds, pistachios, or pecans

1/2 jalapeno (or serrano chile) or less (depending on taste)

sea salt to taste (1/4 teaspoon maybe?)

[some people add garlic, but I like it without garlic]

Directions:

You can tell by the ingredients listed that this is a taste as you go type of recipe. Depending on the flavors of the cilantro, hotness of your jalapeno, and the type of nuts you use the proportions maybe different. Just throw all the ingredients into a mini-prep Processor and taste as you go.

Makes enough pesto for two generously pestoed grilled cheese sandwiches- I am sorry I didn’t measure! If you need a lot, double the recipe.
And now my husband, gluten-free grilled cheese expert, will tell you how HE made the sandwich.

Hey. Natalie asked me to walk everyone through making a grilled cheese. A little disclaimer: This is the only right way to make a grilled cheese sandwich. If you can’t handle that truth, please skip this section.

And now, on to the grilled cheese:

  1. Gluten Free Grilled Cheese Sandwich - Step 1Make sure the stovetop is clean - This is perhaps the most important step in all of grilled-cheese-dom-particularly if you have a smooth electric cooking range that burns and marks easily. Seriously, clean, clean, clean - this is to both fulfill the “ounce of prevention” and counteract the “h311 has no fury” axioms.
  2. Gluten Free Grilled Cheese Sandwich - Step 2Gather your ingredients - Lots of butter or margarine, sliced cheese-Cheddar, Colby/Jack, Spicy Jack, whatever you like (even American if you’re into eating plastic), and sliced bread. The goal here is to have everything on-hand and ready-to-use so as to keep full attention on the pan and avoid any mishaps.
  3. Gluten Free Grilled Cheese Sandwich - Step 3Nuke the bread - If you’re using gluten-free bread, it’s likly that it’s coming from the freezer all stuck together and cold. Put all of the bread that you think you will use in the microwave for a minute or so on the defrost setting. Now we’re ready to turn on the stove.
  4. Gluten Free Grilled Cheese Sandwich - Step 4Melt the butter - Turn on the stove to the middle setting and let the pan get hot. Add a slug of butter (1/16th of a stick) and cover the bottom of the pan with it. Ideally you want enough butter to soak a little way into the bread.
  5. Gluten Free Grilled Cheese Sandwich - Step 5Add the bread - Take two slices of bread and add them to the pan. Make sure that they lie flat and get fully covered in butter. Leave them there until they get a nice toasted look on the underside (Yes, it’s okay to peek) Note: Some people like to combine steps 4 and 5. This is a mistake as coverage is never as uniform as an in-pan application; it is an inefficient use of time-particularly when making several sandwiches; and it unnecessarily challenges the integrity of the already-structurally-challenged gluten-free bread.
  6. Gluten Free Grilled Cheese Sandwich - Step 6Add more butter - As you get ready to flip the bread over you will notice that your butter has been soaked up into the bread, so reload, add more. I generally push the bread off to one side and melt the butter on the other side, but another technique is to hold one slice up and melt the butter in its place so that step 7 is easier.
  7. Gluten Free Grilled Cheese Sandwich - Step 7Flip the first slice - Similar to step 5 but requiring a little more dexterity as the pan is crowded and gravity is working against you. You only want to flip the first slice as the other one will have its second side grilled in step 9.
  8. Gluten Free Grilled Cheese Sandwich - Step 8Add the cheese and flip the second slice on top of the cheese - Quickly — good thing you have it all sliced and ready-to-go right there. Normally this would require two steps but I wanted to underscore that they must be performed in such a quick sequence that it would seem instantaneous to the untrained eye. This is crucial to obtaining an even melt and thorough heating. Keep this configuration until the bottom surface is well-toasted.
  9. Gluten Free Grilled Cheese Sandwich - Step 9Flip the whole assembly - Grill the other side of the sandwich. When done remove it from the pan and serve hot.

There you have it, a fully cooked, four sides grilled, evenly melted, delicious grilled cheese sandwich.

CILANTRO PESTO GRILLED CHEESE SANDWICH

gluten free cilantro pesto grilled cheese sandwich


Add This AddThis Feed Button

Apple Quinoa Cookies with Dates and Walnuts

This morning I woke up to Dan staring me straight in the eyes. When I opened mine, he grinned and started cooing. It was completely adorable. A great way to start the morning. I also got up before Jude this morning which is a rare occurrence in this house. It was so nice to drink my coffee and collect my thoughts for a few moments before he got up. I made banana bread for the sleeping boys and gazed out the window at the overcast sky. I wanted it to rain. It would give me an excuse for the lazy feeling that had come over me. And more importantly, it would give me a chance to clean the high chair. I would love to just throw the thing out in the pouring down rain and let nature clean it instead of me. No such luck today. Obviously, the high chair product development team at Chicco has not seen Jude eat or they would not have made all those little crevices for me to clean. I don’t think they have met a gluten-free toddler either! The mess and crumbs have gotten worse since he went gluten-free because gluten-free things tend to be crumbly and the xanthan gum added to them can superglue things to a variety of surfaces such as hardwood floors, cabinets, and furniture. I am sure no one has a kid as messy as Jude though. My mom says he is worse than the five of us were combined. Eek. I didn’t want to agree with her until Jude smeared refried beans on his chest like war paint. Now I believe her. There is much parenting to do here. Gluten-free parenting.

Here is the recipe for the cookies I made tonight. I know everyone has been madly making oatmeal cookies since oatmeal has been returned to the gluten-free community, but we can’t forget quinoa cookies!

Apple Quinoa Cookies with Dates and Walnuts

APPLE QUINOA COOKIES WITH DATES AND WALNUTS

1/2 cup sorghum flour

1/2 cup rice flour

1/2 cup tapioca flour

1 teaspoon pumpkin pie spice

3/4 teaspoon of xanthan gum

3 cups quinoa flakes

1/2 teaspoon salt

1/2 teaspoon baking powder

8 oz. dried dates, chopped

1 cup walnuts, chopped

1 cup apple, chopped fine (I used my mini-prep food processor)

1 1/2 cups brown sugar

1/2 cup granulated sugar

1 cup butter (2 sticks)

2 large eggs

1 teaspoon vanilla

Directions:

Preheat your oven to 350 degrees. In a med. bowl, beat the butter until fluffy and then add the brown sugar and the granulated sugar- beat for a few more minutes. Add the eggs one at a time and then add the vanilla. In a separate bowl, sift together all the dry ingredients. Slowly add to butter mixture- mix until combined. Mix in the apples, dates, and walnuts. Spoon on to cookie sheets lined with parchment paper. Make the cookies big- maybe a little more than 2 Tablespoons worth of dough. Leave about 2 inches between the cookies. Bake for about 19 minutes. Do not brown the cookies, but take them out when the edges begin to get a little brown.

2.5 dozen big cookies

Note: These are sweet. So if you don’t like your cookies to be sweet, you might be able to reduce the sugar by 1/4 cup. If you do reduce the sugar, let me know what the results were.


Add This AddThis Feed Button

Menu Plan Monday- October 1st

This weekend was beautiful in Raleigh. The Fall air finally blew in and it was wonderful to be outside with the boys. We went to the state farmer’s market Saturday and Fall was evident there too. There were already rows and rows of pumpkins waiting to be chosen by little hands. I decided to wait on the carving pumpkins because I really want to take Jude to the pumpkin patch to pick out his pumpkin this year. However, I did buy enormous amounts of collard greens, apples, sweet potatoes, black beans, salsas, and more.

gluten free apple

Practicing food photography with my point and shoot camera this week.

The good news is that I have now read the manual to my camera. Progress.

I never really paid much attention to photography before I started the blog, so I have come a long way these last couple months.

Monday: Black Bean Soup with Pepper Jack Grilled Cheese Sandwiches with Cilantro Pesto

Tuesday: Pork Chops, Collard Greens, and Mashed Sweet Potatoes

Wednesday: Kate’s Spring Rolls

Thursday: Peach Salsa Chicken with Coconut Rice

Friday: Lasagna

When I go to the grocery store I also try and generate some ideas for snacks, breakfast, and lunch so we won’t go hungry the rest of the day either. Hungry toddlers can be picky so I try and have a range of things to offer him if [for example] apples aren’t his thing this week. You never know when they will switch gears on you!

Snack Ideas for Gluten-free Jude: Apples, Sweet Potato Fries, trail mix, bananas, yogurt w/gluten-free granola, raisins, gluten-free cookies, crackers/toast with peanut butter or veggie spread, or a package of natural fruit snacks

Breakfast Ideas: banana bread, Kate’s sweet potato muffins, bananas, eggs, or hot peanut butter quinoa, and [GF]CS Spiced Apple Pancakes

Lunch Ideas: leftovers or sandwiches on gluten-free bread with sweet potato fries and fruit

Baking: I don’t really have anything in mind yet, but I am in the mood to bake a cake! Ok, so I just found this cake to make at Lucullian Delights.

menu

Other gluten free menus of the week: Carrie’s gluten-free menu, Mrs. G.F.’s menu, Katherine’s Autumn Menu Ideas #3 , and Karen’s menu.


Add This AddThis Feed Button

Buckwheat Sweet Potato Quick Bread

I saw some good-looking sweet potatoes (Carolina Ruby) at Whole Foods today and decided that it was finally time to bake something for Gluten A Go Go’s Bread Baking Bonanza blog event for National Celiac Awareness Month and the World Day of Bread, October 16th. I can’t wait to get my hands on all those gluten-free bread recipes!

gluten free buckwheat sweet potato quick bread

BUCKWHEAT SWEET POTATO BREAD

1/2 cup buckwheat

1/2 cup sorghum flour

1/2 cup tapioca flour

1/2 cup rice flour

3/4 cup organic brown sugar

3 Tablespoons ground flax seed

2 teaspoons+ orange zest (I think I will add even more next time)

2 teaspoons baking powder

1 teaspoon cinnamon

1/4 teaspoon nutmeg

1 teaspoon xanthan gum

1 egg, beaten

3 Tablespoons vegetable oil

1 cup freshly squeezed orange juice

12 oz. mashed cooked sweet potatoes (I baked mine)

Directions:

Preheat the oven to 350 degrees. In a medium bowl, combine all of the dry ingredients-from buckwheat flour to xanthan gum. In a separate bowl, combine sweet potatoes, orange juice, oil, and egg. Pour dry ingredients into the liquid ingredients and mix until moistened. The mixture will be sticky- I had enough liquid with 1 cup orange juice, but depending on the amt of sweet potatoes you may need to add a little more juice to moisten the dough. Pour in a greased loaf pan. Bake for about 50 minutes. Let the bread cool in a pan for 10 minutes and then loosen from the pan. At this point, I greedily slice the bread, but you may want the bread to cool a little before cutting.

I was inspired by this recipe in Cooking Light.


Add This AddThis Feed Button

Pesto Penne with Kale, Bacon and Mushrooms

I am a traditional Southern woman. I cook my greens in pork fat and serve them with sweet tea. However, if my father-in-law(from California) asks , I did not deep-fry anything today. He likes to tease me. I felt like cooking this afternoon, so I made my dinner early. I am very lucky that I have that luxury; my husband works from home. Jude enjoyed the penne and bacon very much and ate kale and mushrooms only accidentally. He doesn’t know what to think about the texture of greens yet, but he will learn to like them one day.

gluten free pasta

PESTO PENNE WITH KALE, BACON, AND MUSHROOMS

6-8 slices of gluten-free bacon

1 bunch of kale, thick stems trimmed, leaves coarsely chopped

1 pint of mushrooms, sliced

3 Tablespoons of basil pesto (you don’t want too much-just want to coat penne noodles)

12 oz. Tinkyada brown rice penne noodles (1 bag if using Organic Tinkyada Penne), cooked and rinsed

2 cups chicken broth

Directions:

Cook the bacon. When the bacon is done cooking, remove it from the pan with a slotted spoon and place on a paper-towel lined plate. Reserve the bacon drippings in the pan (if there is more than a couple tablespoons, you may want to drain some of the fat) and wilt the kale for 2 minutes. Add the mushrooms and chicken broth. Cook the kale and mushrooms for about 10 minutes or until both are tender. Add 3 Tablespoons of basil pesto to the cooked Tinkyada noodles- you just want to lightly coat the noodles for a little flavor. With a slotted spoon, add the mushroom and kale mixture to the penne. Crumble bacon and toss it with penne. Note: I did not add any of the cooking water, but you may wish to add a little.

Serves 4


Add This AddThis Feed Button