
I have made this soup since my college days. I always serve my soups in the soup bowls my mom passed down to me because it reminds me of childhood (pic above). This soup, however, is not your traditional childhood chicken and wild rice soup because it is milk-based and has a white wine addition. It is delicious though, so I hope some of you will try it for dinner soon.
Enjoy!
CHICKEN AND WILD RICE SOUP
3 chicken breasts, cooked and shredded (leftover chicken or rotisserie chicken work well too)
2 14 oz. cans of chicken broth (make sure you are buying a gluten free brand or making a homemade gluten-free version)
1/4 cup uncooked wild rice
3/4 cup shredded carrot
1/4 cup celery, diced
1/3 cup leek, sliced
1/2 teaspoon dried thyme
1/4 teaspoon black pepper
2 Tablespoons butter or butter substitute
2 Tablespoons brown rice flour or sweet rice flour
1 cup whole milk or casein-free milk substitution
2-3 Tablespoons dry white wine
DIRECTIONS:
In a large dutch oven, combine chicken broth, carrot, celery, uncooked wild rice, leek, dried thyme, and pepper. Bring to boiling. Reduce heat and simmer for 1 hour or until the rice is tender.
In a med. saucepan, melt butter (or substitute) and then stir in your rice flour. Once the mixture is bubbly (2-3 mins), slowly stir in your milk or milk substitution. Cook until thickened and bubbly. Slowly add this mixture to the chicken broth/wild rice mixture. Stir in your chicken and white wine. Heat through. Ladle into soup bowls and serve with a mixed green salad.
Serves about 4.
This recipe was adapted to be gluten-free (and several proportions changed) from a Simple Soups & Stews (Better Homes & Gardens) recipe. I have loved this recipe for several years now.
If you liked this post, please Stumble it! or Add to Del.icio.us.
Posted by Natalie
Filed under: Soup Recipes | 9 Comments »
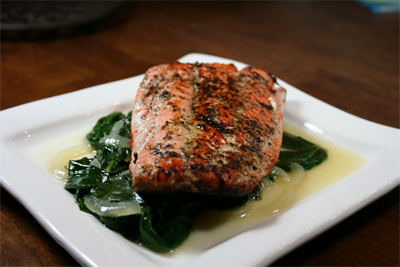
I am trying to eat more fish and more greens in the New Year. This recipe is quick, easy, and delicious. My husband really liked this dinner, so I will be making it a lot for my family. He said the spinach was the best he has ever tasted- what a sweetheart. Jude refused to eat any, but he hasn’t been eating dinner much anyway. Lately, I have been thinking about serving him dinner for breakfast instead. He eats the most at breakfast or lunch and refuses to eat his dinner. I have heard that this is pretty typical toddler behavior, but it is hard on me. He used to eat anything, but has become extremely picky. SO, I am making him pizza at 10 in the morning because I feel sorry for him. He will be 2 this month! I can’t believe it.
As for Dan, he will be starting solid food soon! He will be six months next week. I need to start thinking about what I want to feed him. I am not big on overloading my kids with commercial rice cereal, so I need to come up with something else. And for those of you shocked that he hasn’t started solid foods yet- he weighs 21 lbs exclusively on mama’s milk. Goodness!
And here is the recipe for the salmon!
BLACK PEPPER SALMON SERVED OVER SPINACH
2 salmon fillets
1/4 cup dry white wine
1 cup chicken broth or vegetable broth
dash of white pepper
salt (if chicken broth/veg broth is not sufficient)
1 med. onion, peeled and very thinly sliced (leeks would be a nice variation too)
Roughly 2 Tablespoons of freshly cracked black pepper
2 Tablespoons olive oil
1 bunch fresh spinach, washed, stemmed, and dried
DIRECTIONS:
In a baking dish, combine chicken broth, white pepper, and wine. Remove half of this liquid mixture to another bowl to use later to saute spinach. Add onion and salmon to the baking dish with the remaining 1/2. Cover and chill both the salmon and the reserved marinade for 30 minutes to 2 hours.
Spread your cracked pepper on a plate. Remove the salmon and onion from the marinade. Press the cracked pepper into both sides of the salmon fillets. In a large skillet, heat olive oil to medium heat. Add onion and cook until soft, about 5 minutes. Remove with a slotted spoon.
Increase the heat to about med-high. When your olive oil is almost smoking, place salmon flesh side down in the skillet and cook until browned, about 10-12 minutes. When salmon is just cooked through, remove from the skillet.
Add spinach, onions, and reserved marinade to your skillet and cook until the spinach is just limp- maybe 3 minutes.
Place spinach and onion mixture on the dinner plates and then place the salmon directly on top. Spoon some of the sauce over the salmon and serve.
Serves 2 (can be stretched to 4 if you buy extra salmon fillets or cut larger salmon fillets in half)
If you liked this post, please Stumble it! or Add to Del.icio.us.
Posted by Natalie
Filed under: Fish Recipes | 14 Comments »
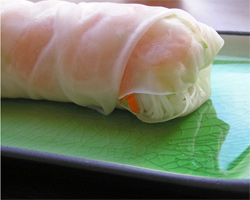
This is my first recipe post of the New Year! It feels great to be back in my own kitchen again. I had a wonderful holiday in California, but it feels good to be back in a routine. I am excited about planning my menu again, trying new recipes, and creating a few too. My husband and I got a Canon Digital Rebel XTi Camera for Christmas (how sweet is that!) from his parents and I am still trying to convince him that is 60% mine and only 40% his. haha. I also got an external flash for the Canon and a Graslon flash diffuser. (Which is actually really great for food photography, no need to stick the whole plate in a lightbox anymore.) I was using a point and shoot camera on Gluten Free Mommy until now (the spring roll pic below was taken in the Fall and the chocolate cake pic last Spring with the point and shoot camera also). I have several resolutions for the New Year and improving the food photography at Gluten Free Mommy is definitely one of them. I would love to be able to take better pictures of the food I make- part of the reason people try a recipe is because of how good the food looks in the photo! I am excited about participating in Karina’s Flickr group of Gluten Free Food pictures. Yum.
In the New Year, I would like to continue posting easy recipes for the average cook. A lot of people who start a gluten-free diet did not cook much before they went on a gluten-free diet or are moms (like me!) who want to cook but can’t be in the kitchen for hours everyday. Every now and then I will throw you guys a challenge, but I know most of us are looking for weeknight meals or holiday recipes that can be made without a lot of fuss or going to eight different grocery stores for ingredients. I also try to cook and eat seasonally, but I do reach for frozen blueberries in January (so sue me). There is just not a whole lot my toddler will eat that is seasonal! Parsnips- oh please! Jude will not touch them. I will try to throw parsnips in a soup later and see if my budding food detective will eat them. Not likely!
I am going to continue the Gluten Free Menu Swap because I LOVE reading everyone’s menu on Monday and it inspires me to create my own menu for my family. The Gluten Free Menu Swap is back on for Monday. I will host the first one and my ingredient of the week is….PARSNIPS. Go run and hide, Jude! If you would like to take a turn at hosting the Gluten Free Menu Swap, please email me when you would like to host and what ingredient you would like to showcase. I have learn something new about each ingredient every week we do the swap. If you want to participate for the first time, don’t be shy! If you want to submit a menu only sporadically that is cool- there is no reason you have to do a menu every week. All you need to do is email the host of the week (found on the swap page) and make sure you link back to the host. If you don’t have a blog, feel free to comment and let me know what you are making that week. I always need ideas about what to make for dinner and I would love to hear from you.
My favorite recipes for 2007 on Gluten Free Mommy
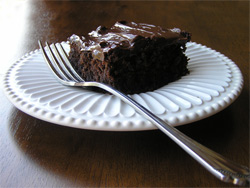
Lighter than Air Chocolate Cake (flourless)
No Frills Chocolate Cake
Thai Chicken Wraps
Pumpkin Chicken (or Beef) Enchiladas
Baked Eggplant Parmesan
Apple Crisp
Just a Few Recipes I TRIED and LOVED on other Gluten-Free Blogs
Mrs. G.F.’s Coconut Chicken Fingers with the Marmalade Dipping Sauce
Gluten Free Gobsmacked’s Spring Rolls (picture of the spring rolls I made above)
Gluten Free Goddess’ Rustic Chicken Soup
Carrie’s Sweet Potato Apple Casserole
Gluten Free Cooking School’s Apple Spice Pancakes
And for my first recipe offering of the New Year!
This is a very easy dinner or quick lunch idea. Stir-fries are a favorite around here! This is the absolute simplest stir-fry I make. It is a great recipe to make when you have a pack of chicken and only a couple bags of frozen veggies and need dinner super-quick!

EASY KUNG PAO CHICKEN
1 lb. of chicken breasts/tenders, cut into 1/2 inch pieces
1/4 cup of San-J’s Wheat-Free Tamari Sauce, divided in half (2 Tablespoons is half)
2 Tablespoons of freshly squeezed lemon juice
2 Tablespoons sugar
2 teaspoons cornstarch (optional- for thickening)
1/4 teaspoon of crushed red pepper
1/4 cup water
2 Tablespoons canola oil
1 clove garlic, minced
1/4 cup onion, diced
1/4 cup roasted peanuts, chopped
1 cup (roughly) of Desired vegetables (carrots, mushrooms, red pepper, or leftover sugar snap peas)
DIRECTIONS:
Marinate the chicken with 2 Tablespoons of soy sauce in the refrigerator for at least 30 minutes. In a separate bowl, combine garlic, lemon, water, remaining soy sauce, cornstarch, sugar, and red pepper flakes. In a wok or skillet, heat the canola oil over med.-high heat. Add chicken and onion and stir fry until brown about 4 minutes. Add desired vegetables and stir fry another 3-4 minutes. Add sauce and stir frequently until thickened slightly (if using cornstarch) or until heated through and bubbly. Serve over brown rice and sprinkle with peanuts.
Serves 4.
If you liked this post, please Stumble it! or Add to Del.icio.us.
Posted by Natalie
Filed under: Chicken Recipes | 16 Comments »
My fruit and nut cookies are perfect for Christmas. The pistachios and the dried fruit in these cookies give them an unmistakable hint of the season. These cookies have a little something for everyone, so no matter what mood you are in- these cookies will hit the spot! Every bite is just a little bit different! So, turn some Christmas music on and get baking!
P.S. My favorite Christmas album is Poets & Angels: Music 4 the Holidays . I look forward to that Spanish guitar all year! Any suggestions for other great Christmas albums? I want to add a few cds to my collection this year. What is your all-time fav Christmas music?

FRUIT AND NUT COOKIES
2 1/4 cups gluten free flour mix (I used equal parts sorghum, tapioca, and brown rice flour)
1 teaspoon baking soda
1 teaspoon salt
1 teaspoon xanthan gum
1 stick of unsalted butter plus 6 tablespoons (or 14 Tablespoons), room temperature
1 cup of brown sugar
1/2 cup granulated sugar
1 teaspoon vanilla
2 eggs
1/2 cup white chocolate chips
1/2 cup shredded coconut, chopped/ground in food processor (my hubby doesn’t like the texture of coconut, so I hide it!)
1/4 cup mini chocolate chips
1/2 cup pistachios, chopped
1/2 cup dried cherries, chopped
1/2 cup dried assorted fruit (I did pears, apples, apricots), chopped
1/2 cup slivered almonds
DIRECTIONS:
In a med. bowl, sift together your dry ingredients- flour mix, baking soda, salt, and xanthan gum. Set aside. In your stand mixer, cream your (14 Tablespoons) butter and sugar until fluffy- about 3 minutes. Scrap down the sides to make sure the sugar and butter are thoroughly combined. Add your eggs one at a time; then add your vanilla. Slowly add your dry ingredients until fully incorporated. Then it is time to add your own custom mix-ins. I have given my proportions above for coconut, pistachios, dried fruit, almonds, and white and mini semi-sweet chips. After you add your mix-ins, cover your dough with saran wrap and refrigerate for at least a few hours (to prevent the cookies from spreading). When you are ready to bake, use a tablespoon of dough and space about 2-3 inches apart. Bake for 10-13 minutes at 350 degrees.
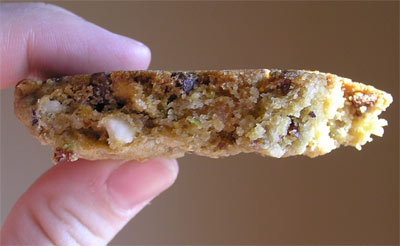
Makes about 3 dozen soft, chewy, delicious, fruity, nutty, gluten-free Christmas cookies.
These freeze beautifully- I am freezing some for my upcoming plane trip to CA.
Ginger Lemon Girl has promised to do a gluten-free Christmas cookie round-up on Dec. 17th. Get your entries in! I can’t wait to see all those gluten-free cookie recipes!
And for all you locals of Raleigh, the News Observer published this article about celiac disease/gluten free food industry last Saturday. Sorry I missed it! It mentions a couple of gluten-free dining choices in the Triangle area. However, in my opinion, there are not a lot of gluten-free dining choices out there. If you are a citizen of the Triangle area, let me know if you dare go out to eat and where!?
If you liked this post, please Stumble it! or Add to Del.icio.us.
Posted by Natalie
Filed under: Cookie Recipes | 17 Comments »
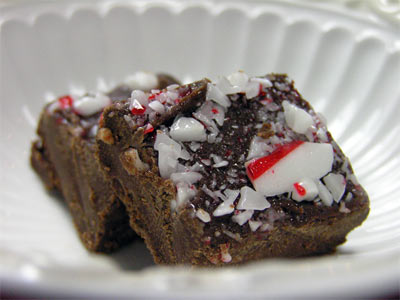
Everyone knows I am not a food snob- just a food lover! So, I wanted to share my exceedingly easy recipe for 5 minute Peppermint Fudge. No candy thermometer. Gasp! No Double Boiler. This recipe is the kind you throw together the night before your office party. Simple. Easy. Fabulous. And since I know my readers are all busy people (lots of us are mommies too) I decided to share my Peppermint Fudge recipe. It is for those of us who need something naturally gluten-free and EASY for their next holiday party.

5 MINUTE PEPPERMINT FUDGE
1 can sweetened condensed milk
1 12 oz bag of gluten-free chocolate chips (I use semi-sweet)
1 oz. unsweetened chocolate, chopped coarsely
1/2 tsp- 3/4 tsp peppermint extract (I only wanted a hint of mint, so taste and add more if that is the way you like to roll)
2 candy canes, crushed (I pounded mine in a ziploc bag)- optional
DIRECTIONS:
Line a 2 qt. square casserole dish with aluminum foil and set aside. In a microwaveable medium bowl, pour in the condensed milk, chocolate chips, and stir in the chopped unsweetened chocolate. Mix to combine. Microwave for about 45 sec. (depending on microwave) and then slowly stir the chocolate. It will melt as you stir. If you need to put it back in the microwave, go ahead, but don’t overheat chocolate- no more than another minute or so. If you want to get out that double boiler, it is the proper way to melt chocolate. This is the hurried, busy way! After you chocolate is melted and stirred, add the peppermint extract to taste. Just remember that a little goes a long way. Pour the chocolate mixture into the casserole dish lined in foil. Sprinkle the mixture with the crushed candy canes. Cover with saran wrap and let the fudge set for at least four hours or overnight. Then cut the fudge into tiny squares and carefully remove the fudge from the foil. Store in an airtight container in the refrigerator.
Makes: 25 pieces
Note: If you prefer plain fudge, omit the peppermint extract and the candy canes and use 1 tsp gluten-free vanilla instead.
If you liked this post, please Stumble it! or Add to Del.icio.us.
Posted by Natalie
Filed under: Candy Recipes, Chocolate | 13 Comments »


 I am
I am  I am
I am  I am
I am