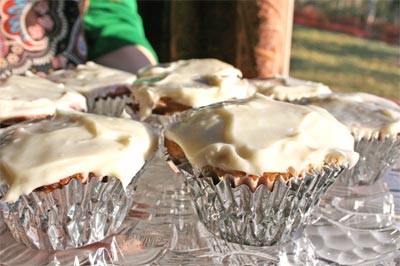
I made these especially for Jude’s birthday party, and they are made very similar to the Carrot Cake I made earlier last week. The main difference in flavor being that the recipe uses bananas instead of carrots. I used my new favorite gluten free flour blend, which includes brown rice flour, millet, almond meal, sweet rice flour, and tapioca flour. The batter will look very similar to Pamela’s Baking Mix (mainly because of almond meal). And can I just say, millet flour has such a fantastic flavor. I still like sorghum flour and teff flour but I am using those flours mainly with my chocolate cocoa-y desserts right now. Even though it is more high-maintenance, I like eating different grains rather than just sticking with one main mix.
These cupcakes were a big hit with gluten-eaters! I would serve these to anyone- gluten-free or not. My sister, Caroline, took five cupcakes home with her. If you know anyone that is gluten-free, you know how their face just lights up when you give them gluten-free goodies.
JUDE’S HUMMINGBIRD CUPCAKES
1/2 cup tapioca flour
1/2 cup sweet rice flour
1/2 cup millet flour
1/2 cup almond meal
1 cup brown rice flour
1 teaspoon baking soda
1 teaspoon baking powder
1 1/2 teaspoons xanthan gum
1/2 teaspoon salt
3 bananas mashed (about 2 cups)
1 1/2 cups granulated sugar (if you are trying to reduce sugar you can get away with reducing by 1/4 cup if you wish)
1/2 cup brown sugar
1 cup crushed pineapple, drained (you can add a little juice depending on thickness of batter)
1 teaspoon ground cinnamon
1 Tablespoon vanilla extract
1 cup shredded coconut, ground (food processor works well)
3 large eggs
2 sticks butter or butter substitute
DIRECTIONS:
Preheat oven to 350 degrees. Make sure the rack is in the center of the oven. Line 2 muffin tins with cupcake liners.
Grind the almond meal and coconut. Set aside.
In a med. bowl, sift together the flours, salt, cinnamon, baking powder, baking soda, and xanthan gum.
In your stand mixer, cream together your butter and sugar- about 3-4 minutes. Add vanilla. Add the eggs one at a time, making sure each one is incorporated before adding the next. Beat at medium speed until mixture is pale yellow and fluffy- about 3 minutes. In a separate bowl, combine pineapple, banana, and coconut. Add to the batter. Stir in flour mixture.
Divide batter evenly among cupcake tins. This batter will make at least 24 cupcakes but maybe a little more. Only fill the cupcake tins about 2/3 full.
I baked all the cupcakes at one time, rotating front to back once. My cupcakes took about 20 minutes to bake, but I would recommend setting your timer for less in case yours bake faster. The millet flour will give these a beautiful golden color once baked.
Once your cupcakes have cooled, frost them with your favorite gluten-free frosting. I made these the night before Jude’s little birthday party and stored them in the refrigerator. I think they will keep for about 3 days in the fridge, but they didn’t last more than 2 in my house!
Makes about 24 cupcakes (maybe more)
Note: The banana flavor in these makes them perfect for a gluten free toddler’s birthday cupcake. My little boy loves bananas!
If you liked this post, please Stumble it! or Add to Del.icio.us.
Posted by Natalie
Filed under: Cupcake Recipes | 13 Comments »

Last week when I posted Gluten Free Grains 101, many of you asked for the recipe of the cake shown in that post. Well, this isnt it! Haha. This is a recipe for carrot cake, which several of you requested when seeing that cake. Since I haven’t been able to stop thinking about carrot cake I decided to give it a try. There is no shortage of gluten-free recipes for carrot cake out there because carrot cake translates beautifully to gluten-free. Gluten Free Gobsmacked’s exquisite carrot cake is one example, especially with Kate’s secret ingredient (*wink wink*). Since I did not have the ingredients on hand for that delectable cake, I decided to refer to a recipe in Sherry Yard’s cookbook, The Secrets of Baking. This cookbook is not for the beginning cook but is wonderful for someone trying to master the skill of baking. There were a number of things about the recipe that make it a good adaptation:
1) in the financier family (uses almond meal) 2) use of crushed pineapple 3) lots of vanilla 4) a whole teaspoon of cinnamon 5) coconut 6) melting butter until dark golden color gives cake even more flavor
Note: You can just sub your gluten-free flour mix for the one I used. I did not like sorghum flour with this one (although you might), so I used a different flour mix. The gluten free flour blend I did use was awesome and there was not a hint of gluten-free about the cake.
Additional note: Sherry Yard’s recipe called for 2 10 inch baking pans, so my original plan was to make a triple decker carrot cake with 3 nine inch pans. However, there was only enough batter for 2 9 inch cakes (no idea why). Next time, I might double the recipe to make a triple decker carrot cake and use any leftover batter for cupcakes to freeze. I just think a triple decker cake is very festive!
Here is the recipe with my gluten-free alterations:

GLUTEN FREE CARROT CAKE
2 sticks of unsalted butter
2 Tablespoons millet flour
2 Tablespoons sweet rice flour
1/2 cup brown or white rice flour
1/4 cup tapioca flour
1/2 cup almond meal (I ground sliced almonds in my mini food processor)
1 tsp. baking powder
1 tsp. baking soda
1 tsp. xanthan gum
1/2 cup white sugar
1 tsp. ground cinnamon
1/2 cup powdered sugar
1/2 cup packed light brown sugar
3 eggs, at room temperature
1 Tablespoon vanilla extract
1 cup finely grated carrots or up to 1 3/4 cup
1 cup unsweetened shredded coconut, pulverized in food processor too
1 cup crushed pineapple, mostly drained (eyeball and add a little juice if you need it)
Cream Cheese Frosting ( 2 8 oz. bars of cream cheese, 1 stick of butter, 2 1/2 cups of powdered sugar, 2 T. lemon juice, a little lemon zest, 1 tsp vanilla)
DIRECTIONS:
Get all your ingredients ready. Grind the almonds, coconut, etc. Preheat the oven to 350 degrees make sure your rack is in the center, and prepare your baking pans (2 9 inch baking pans or 3 if you are doubling the recipe) by greasing them and putting parchment paper in the bottom of each pan.
In a med. saucepan, melt the butter over med. heat until the butter is a dark golden color and the solids begin to separate. This process will probably take 7-10 minutes. Remove from heat and let the butter cool (not in the fridge) for about 30 minutes. Yard said the butter should be cooled to about 70 degrees. Basically, it should still be in liquid form but not hot.
In the bowl of your stand mixer, sift your almond meal, other gluten-free flours, xanthan gum, baking soda, and baking powder. Turn the paddle on and make sure it is mixed well.
In a separate bowl, mix the granulated sugar and cinnamon together. Add the powdered sugar and then blend in the brown sugar.
In yet another bowl (you may have quite a mess to clean up), whisk the eggs and add vanilla. Stir into the sugar mixture and whisk until incorporated.
At this point, turn your mixer on and pour the sugar/egg mixture in the bowl until combined. Then slowly add your cooled melted butter (including any brown bits). Make sure you scrape down the sides of the bowl and combine well. This will probably take 3-4 minutes.
The next step is to mix in the pineapple, shredded coconut (ground a little in food processor first) and carrots with a balloon whisk. You can also add nuts but my husband isn’t a big fan, so I omitted them entirely. I did put sliced almonds on the sides of the cake once I had frosted it.
Pour into the baking pans and bake until a toothpick comes out clean- it took my cakes approximately 35 minutes to bake. Yard’s original recipe calls for a 45 minute baking time.
Once the cake has cooled, frost the cake with the most decadent cream cheese frosting you can find. This cake is extremely fat and sugar-filled, so those on a diet should not eat this cake. Looking at this cake might even make you gain a pound…
This cake is best made the night before and chilled in the refrigerator before serving. It will keep in the refrigerator for about 3 days.
If you are looking for a gluten-free, casein-free carrot cake, try Cindalou’s Carrot Cake.
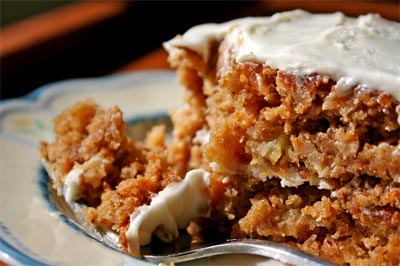
I made this especially for Jude because it is his “Happy Day” today.
Happy Birthday, Jude!
And this is my 100th post.
If you liked this post, please Stumble it! or Add to Del.icio.us.
Posted by Natalie
Filed under: Cake Recipes | 22 Comments »

My little sister, Madelyn, is a pescetarian, so I am always looking for another easy way to make fish. I hope she will give this one a try! I made this recipe last night for my family, and my husband really liked it. I think this recipe would be a good one to serve company because it looks impressive and it is unbelievably easy. I am sure there are a number of ways you could vary this dinner to dress it up and make it your own. And a note about the coconut rice- My husband, a confirmed hater of coconut, LOVES coconut rice and right now this is his favorite way to eat rice. Who would have thought? This recipe- as is- has few ingredients and is therefore perfect for a quick and fabulous weeknight meal. Perfect for impressing the husband apparently.
MAHI MAHI
1 1lb. of mahi mahi fillets
2 Tablespoons of Wheat-Free Tamari Sauce
1/2 T of grated fresh ginger
juice of one lime
sea salt
pepper
Directions:
In a shallow baking dish, mix together the lime juice, tamari sauce, and grated ginger. Place the fish in the baking dish and coat both sides with desired amount of sea salt and pepper. Spoon marinade over fish. Marinate in the fridge for about 30 minutes. In the meantime, get your rice cooker going with the coconut rice (see directions below).
Increase the heat to about med-high. Heat your olive oil until almost smoking, place the mahi mahi in the skillet and cook until both sides are browned, about 10-12 minutes. I spooned a little extra marinade on my fish before browning the other side, but it is optional. When mahi mahi is just cooked through, remove from the skillet.
Serve with a lime wedge, coconut rice, and vegetable of choice.
COCONUT RICE
2 cups jasmine rice
1 can unsweetened coconut milk
1 cup water
1/2 teaspoon grated fresh ginger
salt to taste
just a squeeze of lime juice
DIRECTIONS:
Mix the ingredients for the coconut rice together in your rice cooker and cook according to the manufacturer’s instructions. Eyeball the liquid level and make sure it seems right to you. If it comes out moist, remove the lid and place a dishtowel over the rice cooker and it will fluff up your rice. I had perfect rice with the above measurements. This recipe make a ton of rice because I like eating leftovers the next day for breakfast or lunch. Simply cut the recipe in half if you don’t need that much rice.
Note: It is possible that some rice cookers don’t perform as well as others (i.e. might burn the bottom of the rice), so if this doesn’t work try making coconut rice on the stove. Mine is a medium of the road rice cooker and it worked fine.
If you don’t have a rice cooker, go buy one! I use mine about 3 times a week. A Rice cooker is also great to have when you are traveling gluten-free.
If you liked this post, please Stumble it! or Add to Del.icio.us.
Posted by Natalie
Filed under: Fish Recipes | 25 Comments »
GLUTEN FREE FLOUR 101
Gluten Free Mommy Blog Readers’ Frequently Asked Questions
Is there a 1:1 flour substitution for wheat flour?
No. Gluten free flours work best in baking (most of the time) when they are used in combination with each other. However, there are some exceptions- recipes that call for a small amount of flour (like Orange Almond brownies) may work well with a 1:1 brown rice flour substitution. Another example where you wouldn’t need a gluten-free flour mix combination would be when thickening a sauce like my Green Bean Casserole recipe- sweet rice flour would be a fine 1:1 substitution in that instance.
When going gluten-free, how did you pick which flours to buy first?
Unfortunately, there is not a one-size fits all solution! You need to decide what is important to you when you start experimenting with flour mixes.
Typical considerations:
- glycemic index- this would be a good thing for everyone to consider but especially diabetic celiacs or those trying to lose weight.
- additional allergies- if you have to adhere to a casein-free or nut-free diet, you would obviously need to take this in consideration when picking a mix.
- taste- not everyone likes the same things! For example, whole grain teff flour tastes great to me in a lot of cakes, but some of my readers prefer not to use teff because they personally don’t like the taste it imparts on some baked goods.
- whole grain- getting enough whole grains is on everyone’s mind these days. I try to utilize whole grain flours in my gluten-free baking mix to make sure my family is getting the daily whole grains they need.
- performance- this simply means how well your mix performs. Is the cake moist? How is the texture? Does it taste good? Some people make sure to use all whole grains in their flour mix- I will occasionally compromise this (for example: in the case of tapioca flour) if I feel the overall recipe will be better for it. In my opinion, a cupcake is not supposed to be completely good for you.
- digestion- some people do not tolerate certain flours well. I don’t use bean flours at all. Enough said there!
- cost- some flours are more expensive than others
- availability- with online stores this is becoming less of an issue, but I like to have some local sources to buy gluten-free flour as well
Should you just buy a store-bought pre-made mix or make your own?
Pre-made mixes work well for a lot of people. Pamela’s Baking Mix can be a great all-purpose gluten-free flour, but there are drawbacks. It can be expensive and I find that my own homemade mixes perform better than Pamela’s- for example, my pumpkin pancake experiment. Another popular mix is Bob’s Red Mill All-Purpose Gluten Free Mix, but the bean flour keeps me far away from that gluten-free flour mix.
Where do you store your flours?
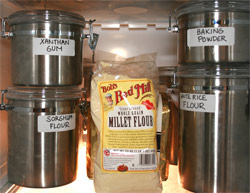 I keep my gluten-free flours in the refrigerator in canisters for a longer shelf life (whole grain flours do get rancid because they haven’t been over-processed and stripped of their nutrition like regular all-purpose flour) and because it is more convenient for me. Some people do fine with their pantry because they use the flours so quickly and they may have limited refrigerator space. I use labeled canisters because my fridge looks neater and it is easier to prevent messy flour spills. I know some people who handle it beautifully, but I could never get the hang of it and I ended up with a wad of 12 different zip lock bags in the fridge. If you pre-make your flour-mix all you need is one zip lock bag or one canister, but since I am always experimenting or using different flours I have one canister of pre-made mix and keep the flours in separate canisters also.
Where do you buy your flours?
I typically buy my flours from Whole Foods or Amazon. I have heard it is cheaper to buy some of the rice flours from a local Asian grocery store, but I have not researched this locally. Call it laziness! Since Amazon sells some of my “must-have” gluten-free flours (and I am a total cookbook addict), I am going to try Amazon Prime to make faster shipping more affordable. Even though some of the gluten-free products are not eligible because they are sold through third-parties, I think it will be worth it for me since we tend to order a lot of gluten-free flour from the Bob’s Red Mill and Arrowhead Mills brand that are eligible and other odds and ends throughout the year. I love the convenience of online shopping, especially now that I have two little ones under two.
How do you measure gluten-free flour?
 This may sound like a silly question because it is essentially the same as measuring regular all-purpose wheat flour. However, when making two batches of banana bread I looked down and saw that I had done a bad job measuring my flours. It was visibly obvious! I went out and bought a Salter scale to measure my flours by weight! This has helped me be more consistent with my measuring- especially with tapioca flour and potato starch! It is important to measure well, so you end up with just the right amount of flour and a good finished product. Update: For the denser flours, I do use different weight measurements. I am coming up with a chart for this and it will be available soon.
Is it important to sift gluten-free flour?
I always sift my gluten-free flour to make sure I do not end up with pockets of one type of flour or pockets of xanthan gum or baking powder. I bought a sifter for this purpose, but you can use a whisk too!
Do you have a gluten-free baking mix?
I am not using a baking mix right now because I am in experimentation mode. However, I love equal parts sorghum flour, tapioca flour, and brown rice flour for cakes, muffins, and quick breads. I made my No Frills Chocolate Cake with that combination. I also like teff flour thrown in that mix- my Chocolate Pumpkin Cake is an example. I am using more sweet rice flour now and I am experimenting with millet flour.
How long can I store my gluten-free flour?
Most gluten-free flours, such as brown rice flour, will keep in the refrigerator for four or five months. Gluten-free flour can be kept in the freezer for up to a year. Before you buy a large amount of flour, make sure to consider if you will use it in this time frame.
Is there a “magic blend” of gluten-free flours that will work for all recipes?
Unfortunately, no! For optimal results, I think it is best for your muffin, cake, or brownie gluten-free baking mix to look very different from the one you use for pizza or bread! That is why I keep a lot of my flours separate so that I can mix them around as needed for recipes. On this blog, I spell out exactly which flours I use in each recipe so that you will know. It is hard with so many choices out there, but I have come to think of my flours as a collection! tee hee.
Which flours do you always have on hand?
Sorghum flour, Tapioca flour, Brown Rice Flour, Cornstarch, Teff, Cornmeal, and Sweet Rice Flour. Yikes!
GLUTEN FREE FLOURS
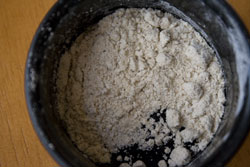 Sorghum Flour
 - Some people describe the taste as nutty, others describe it as bland or tasteless. I think it adds a great texture to baked goods, along with valuable protein. It is a very popular flour in the gluten free community and one that I use frequently. Authentic Foods Sorghum Flour at Amazon
-
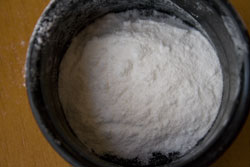 White Rice Flour/Brown Rice Flour-
- These are interchangeable in recipes. The brown rice flour is whole grain and is therefore better for you. If you are concerned about the food budget, buy white rice flour. It is cheaper to buy white rice flour at ethnic grocery stores than your health food store. Rice Flour is great for making a roux and as part of a gluten-free all-purpose baking mix. In recipes that call for a small amount of flour, I normally just throw in rice flour. Brown Rice Flour at Amazon
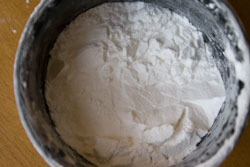 Sweet Rice Flour-
- this is my preferred flour for making a roux. It is an excellent addition to any baking mix and wonderful in pizza and breads. I have started using this flour a lot recently. The almond torte (pic above) was made with a little bit of sweet rice flour. A must-have!Authentic Foods Sweet Rice Flour at Amazon
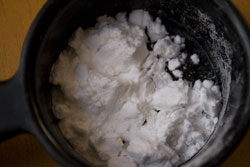 Tapioca Starch/Flour-
 - A great binder in baked goods when used in combination with other flours. It is also a great thickener for sauces. The great thing about tapioca flour is that it will thicken at a low temperature. It will keep in an airtight container in the fridge for two years, but I go through a box in about three weeks! Tapioca Flour at Amazon
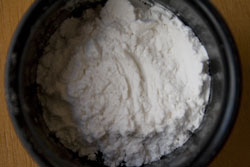 Potato Starch-
 - Not to be confused with potato flour, potato starch is a wonderful thickener and can tolerate higher temperatures than cornstarch. It adds moisture to baked goods. A lot of mainstream flourless chocolate cakes recipes contain potato starch.
Authentic Foods Potato Starch at Amazon
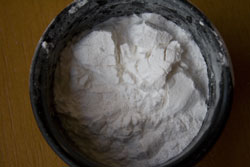 Arrowroot Starch-
 - This is generally considered the most neutral tasting thickener, but it is definitely the priciest! Use arrowroot for acidic sauces. I rarely use this one. I used it at Thanksgiving this year to thicken our gravy, but I may go another route next year. I know a lot of you use it on an occasional basis, so I thought I would mention it here.
Authentic Foods Arrowroot Flour at Amazon
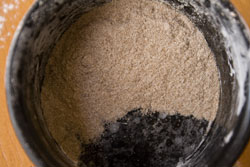 Teff flour-
- This whole grain flour has a mild, nutty, and almost sweet flavor. It imparts a moistness in gluten-free baking. Whole Grain Teff Flour at Amazon
- Buckwheat Flour -
- I stock this flour just so that I can make homemade buckwheat pancakes and waffles occasionally. It is also good as part of a flour combination in muffins and quick breads see my
- Buckwheat Sweet Potato Bread recipe.
Organic Buckwheat Flour at Amazon
- Quinoa flour-
- I like baking with this flour because it gives baked goods a nuttier taste. Quinoa flour is wonderfully healthy; it contains a complete protein. I think quinoa flour also lends more moisture to gluten-free baked goods.
Ancient Harvest Quinoa Flour at Amazon
- Certified oat flour-
- This flour can be used in baked goods. Make sure you buy oat flour that has been certified gluten-free. I rarely buy this flour because I only tolerate oats on an occasional use basis. Lara’s Oat Flour at glutenfree.com
- Coconut flour-
- This flour adds moisture to baked goods. It is a great addition to chocolate desserts! Bob’s Red Mill Organic Coconut Flour at Amazon
- Almond Meal-
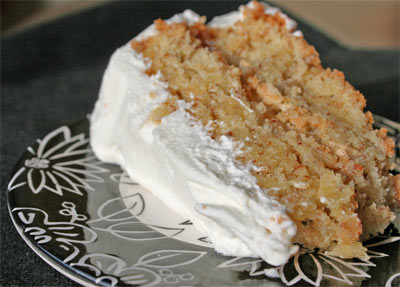
- This meal/flour adds moisture and protein to baked goods. I use it in baked goods all the time. The cake above was made with almond meal, sweet rice flour, and brown rice flour. It is also great for making pie crusts or cheesecake crusts!
Bob’s Red Mill Almond Meal/Flour at Amazon
- Hazelnut Meal-
- This meal/flour also adds protein and moisture to baked goods. I make a hazelnut cheesecake and use hazelnut meal for my cookie crust. I buy it for specialty desserts only. Bob’s Red Mill All-Natural Hazelnut Meal/Flour at Amazon
****This is by no means an exhaustive list, but I hope it gets you on your way to your own personal practically perfect gluten free flour blend!****
MORE GLUTEN FREE BAKING NECESSITIES
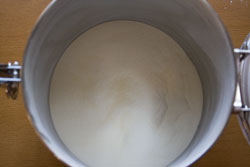 Xanthan Gum-
- This works wonders for gluten-free baked goods. It is expensive, but you only use a little at a time. I only use about a teaspoon for quick bread! It is a great binder. I keep this in a canister. If it spills, do not get it wet because it becomes very sticky and hard to remove. To remove xanthan gum once it has hardened, I use a spatula.
Bob’s Red Mill Xanthan Gum at Amazon
- Baking Soda-
- I like Bob’s Red Mill Baking Soda.
- Baking Powder-
- Make sure it is aluminum-free and gluten-free. Featherweight Baking Powder is gluten-free and also corn-free. Make sure your baking powder is less than six months old.
-
- Go check out more gluten free flour mixes at Gluten Free Cooking School.
If you liked this post, please Stumble it! or Add to Del.icio.us.
Posted by Natalie
Filed under: gluten free flour | 53 Comments »
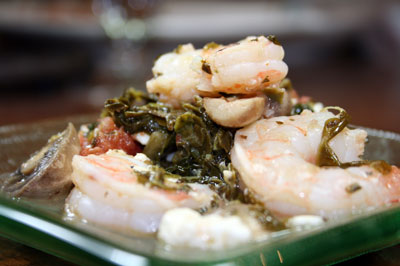
I have not been feeling well this week, so I have been sipping on tea, eating soup, and just generally being grumpy. I think the weather change brought on my cold. It is supposed to snow 1-3 inches tonight in Raleigh, which I am finding more and more believable as the temperature drops. So Dan (my youngest) and I are curled up in bed and my big plan for the evening is to fall asleep with a book. I wanted to quickly post this recipe I made last week before the weekend. This recipe is from one of my favorite cookbooks, Crazy for Casseroles: 275 All-American Hot-Dish Classics. I altered the recipe ever so slightly. Note: If you like casseroles, this may be a good cookbook to buy. It has very few recipes with those dreaded canned soups.
SHRIMP, FETA, and SPINACH CASSEROLE
3 Tablespoons butter (or olive oil or casein-free butter substitute)
One 10 oz. package of frozen chopped spinach thawed and squeezed (OR freshly chopped spinach 1 lb fresh equals 5 oz. frozen)
A can (or a little less) of organic diced tomatoes, drained (fresh tomato would be great if in season)
1/4 lb. feta cheese (optional)
10 oz. (or at least 1/2 lb) fresh med. shrimp, peeled and deveined
1/4 cup leftover gluten free vinaigrette (lemon, garlicky, or greek vinaigrettes would work well)
salt and pepper to taste
1 garlic clove, minced
2 Tablespoons shallots, diced fine
1/4 lb. mushrooms, sliced
3-4 Tablespoons of dry white wine
DIRECTIONS:
Preheat the oven to 350 degrees. Grease a 1 1/2 inch casserole dish. In a large skillet, melt the butter or oil over moderate heat and add the spinach, shallots, garlic, salt, and pepper. Cook for 2-3 minutes. Add the wine and cook for an additional 2-3 minutes. Put the spinach mixture into the prepared casserole dish. Layer the mushrooms over the spinach and then layer the diced tomatoes over them. Place the shrimp on top and layer the vinaigrette over the top. Sprinkle with feta cheese if desired.
Bake until bubbly and cheese is slightly brown- about 25 minutes
Serves 4-6.
This recipe might be good served over Tinkyada pasta or brown rice. I am going to try that next time. Or maybe I will try my hand at gluten-free french bread and serve it with that. Yum.
If you liked this post, please Stumble it! or Add to Del.icio.us.
Posted by Natalie
Filed under: Casserole Recipes | 14 Comments »


 I keep my gluten-free flours in the refrigerator in canisters for a longer shelf life (whole grain flours do get rancid because they haven’t been over-processed and stripped of their nutrition like regular all-purpose flour) and because it is more convenient for me. Some people do fine with their pantry because they use the flours so quickly and they may have limited refrigerator space. I use labeled canisters because my fridge looks neater and it is easier to prevent messy flour spills. I know some people who handle it beautifully, but I could never get the hang of it and I ended up with a wad of 12 different zip lock bags in the fridge. If you pre-make your flour-mix all you need is one zip lock bag or one canister, but since I am always experimenting or using different flours I have one canister of pre-made mix and keep the flours in separate canisters also.
 This may sound like a silly question because it is essentially the same as measuring regular all-purpose wheat flour. However, when making two batches of banana bread I looked down and saw that I had done a bad job measuring my flours. It was visibly obvious! I went out and bought a Salter scale to measure my flours by weight! This has helped me be more consistent with my measuring- especially with tapioca flour and potato starch! It is important to measure well, so you end up with just the right amount of flour and a good finished product. Update: For the denser flours, I do use different weight measurements. I am coming up with a chart for this and it will be available soon.
 Sorghum Flour
  White Rice Flour/Brown Rice Flour-
 Sweet Rice Flour-
 Tapioca Starch/Flour-
  Potato Starch-
  Arrowroot Starch-
  Teff flour-
 Xanthan Gum-

 I am
I am  I am
I am  I am
I am