
When I went gluten free, I was living in Scottsdale, AZ. If you have never been to the Phoenix/Scottsdale area before, it is a great place to be gluten-free. I was working full-time there when I was pregnant with my first son and was suffering from unusually extreme morning sickness (if by morning sickness you mean inclined to be sick just about all the time). I think I cooked once the entire pregnancy. The hormones were so intense I would get sick just from the smell of cooking something. I was literally starving when I got off work and had to be rushed to the nearest restaurant. I was new at the gluten free diet when I got pregnant and it made for a long pregnancy. One of my most vivid memories of the pregnancy is crying when a Papa John’s commercial came on because I couldn’t order any pizza. My husband tried to come to my rescue and made several decent pizzas from gluten free mixes- he made both the Namaste Foods mix and the Arrowhead Mills Pizza mixes. The sweet man struggled with the sticky gluten free pizza dough just so I could have my pizza craving. Then one day, I heard about a pizza restaurant in town that supposedly had the best gluten free pizza. (If my husband swore, he probably would have done so then after making those pizzas with take out just down the road). Gluten free pizza that came in a box? Sign me up. The first time I ordered from Picazzo’s I ordered my pizza ‘to go’ just so it would come in a box. This pizza lived up to the reviews. It is still the best gluten free pizza I have ever tasted. And I think the fact that it comes in a box is only about 15% of the reason it is so good. tee hee. If you are ever in the Phoenix/Scottsdale area, you must have this gluten free pizza. If you are looking for the best gluten-free buffalo wings ever, they can provide that also! I loved Picazzo’s and was very sad to have to leave it behind when we moved to Raleigh. Apparently, the availability of take-out gluten-free pizza can not rank in the top ten reasons to stay in a particular city. I thought that it was a good reason to stay in Phoenix at the time, but maybe it was just the hormones.
Anyway, having been spoiled in Scottsdale, I have been reluctant to make gluten-free pizza at home. However, those stupid Papa John’s ads in my mailbox kept taunting me so a couple months back I decided to give it a go. I made gluten free pizza several, several times and never came up with anything special until tonight. I really like this gluten free pizza crust recipe; it is by far the best one I have made to date. It is different than Pizza Picazzo’s recipe (it doesn’t come in a box!), but it is delicious and has the texture of gluten pizza just like Picazzo’s pizza did. I hope you enjoy it!

GLUTEN FREE PIZZA CRUST RECIPE
1/4 cup millet flour
3/4 cup white rice flour (or use a mixture of brown rice and white rice flour)
1/4 cup sweet rice flour
1/4 cup arrowroot starch (or use cornstarch or more tapioca starch)
1/2 cup tapioca flour
2 teaspoons xanthan gum
3/4 teaspoon salt
1 1/2 Tablespoons sugar
1 teaspoon sugar for proofing yeast
2 1/2 teaspoons active dry yeast
3/4 cup warm water, (heated to 115 -120 degrees)
2 Tablespoons ricotta cheese (for casein free try almond meal)
2 eggs
2 1/2 Tablespoons olive oil
1/2 teaspoon red wine vinegar or apple cider vinegar
1 Tablespoon Honey
Note: If you like your pizza dough seasoned, try adding some Italian seasoning to the dough. I like to keep mine plain.
DIRECTIONS:
Place your pizza stone (or pan) in the oven and heat the oven to 170 degrees to get the stone warm. Prepare your liquid ingredients. Mix the olive oil, ricotta cheese (if using almond meal, save and add to the dry ingredients), honey, and vinegar in a med. measuring cup or bowl and set aside so the mixture comes to room temperature. This mixture should not be cold when mixed with the dry ingredients. Next, combine all the dry ingredients and sift together in the bowl of your stand mixer. I used my paddle (not the dough hook) for this recipe. Heat 3/4 cup of water until it reaches 115 -120 degrees. In a separate small bowl, place your yeast and the teaspoon of sugar. Mix with about 1/4 cup of the heated water, stir, and let it sit for a few minutes. Once you know the yeast is active, proceed with the recipe. At this point, you want to double check and make sure all your ingredients have come to room temperature. Turn the stand mixer (fitted with paddle) on and give the dry ingredients a few twirls. Add the egg, ricotta mixture to the dry ingredients and give it another few twirls. Add the yeast mixture. At this point, gauge the liquid level. You want the dough to look like stiff cake batter. The dough should still hold the swirls of the mixer, but it should be shiny and not dull. Add the rest of the water slowly until the right consistency is achieved. I used another 1/2 cup - making 3/4 cup of warm water total. Since different brands of flour and measuring techniques vary, it is best to eyeball this and add the water slowly to get the texture you want. You will get good at knowing what gluten free pizza dough is supposed to look like.
Once you have the pizza dough made, take the pizza stone out of the oven. You can turn the oven off at this point and leave the light on in the oven. Fit the pizza stone with parchment paper (do not use waxed paper) and lightly brush olive oil over the parchment paper. With a cake scraper, slowly spread the pizza dough batter in a 12-13 inch circle. You want the batter to be evenly distributed. At this point, you want to create a beautiful crust edge to your pizza. This can be tricky with such sticky dough. Cover your hands in olive oil and shape the edges like you want them. If you find your hands getting too sticky get a little more olive oil on your hands. You don’t want your dough to be too wet, so be careful. At this point, I put my stone back in the oven for a 40 minute rise. Once it has risen for 40 minutes, turn the oven to 375 degrees for 10 minutes to prebake crust.
Then add toppings. Hormel has gluten-free pepperonis! Turn the heat up to 400 degrees and cook for about 7 minutes maybe more. If you want your cheese to brown, turn the broiler on for about 2 minutes before taking the pizza out. Be careful though because the pizza will burn if left too long- I recommend watching this process carefully!!
Update: I have also made this pizza without letting it rise with excellent results! I was impatient, I confess, and it came out with an even thicker, fluffier, crust. So no matter which way you roll, it will come out great.
Makes 1 12-13 inch pizza crust.
Check out Gluten Free Guide’s Pizza Party for more gluten free pizza recipes.
If you liked this post, please Stumble it! or Add to Del.icio.us.
Posted by Natalie
Filed under: Pizza Crust Recipes | 47 Comments »
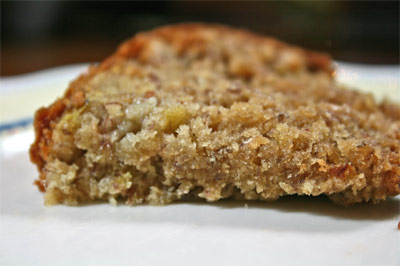
I have had a ridiculously long day away from my little ones. I am attending a doula workshop all weekend (there I go acting like a hippie again) which has made me completely exhausted. My sister and I are attending the workshop together which has made the experience more fun for me. Since we are both gluten-free, we are trying to prepare gluten-free snacks for the occasion so we won’t starve all weekend. So far we haven’t done very well. I was so busy getting the kids ready for the weekend that I didn’t manage to make any sandwich bread, although I did make a great banana bread which Caroline and I snacked on throughout the day. I am up nursing Dan anyway, so I thought I would post the recipe before I go to sleep!
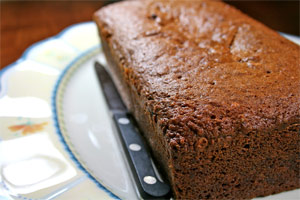
This banana bread recipe is one of the more moist dense banana breads I make. It is packed with great flavor and stays moist for days. I would say that it is my best banana bread recipe so far, but most of the time my pantry rules my banana bread recipe. Since it is a staple, I play with it often and use what I have on hand. My favorite banana breads are moist and dense and very fresh tasting, so that is what you will find in this recipe. Feel free to change the flour mix (3 cups) as this recipe is very forgiving. Don’t let my crazy list of flours intimidate you. This recipe is best made the night before - the flavor just gets better if you wrap it up airtight and let it sit overnight. This recipe freezes well. I freeze mine in slices for easy reheating.
Speaking of bananas, the Gluten Free Menu Swap‘s ingredient is bananas this week. The swap will be hosted by me this week!
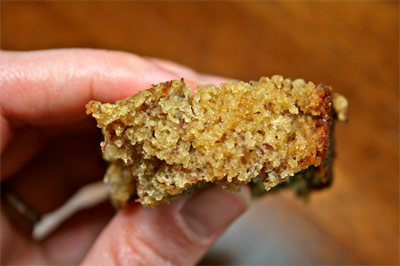
MY GLUTEN FREE BANANA BREAD RECIPE
1/4 cup gluten free quick-cooking oatmeal
1/4 cup almond meal
1/2 cup millet flour
3/4 cup tapioca flour
1 cup rice flour
1/4 cup sweet rice flour
2 Tablespoons flax seed meal
3/4 cup brown sugar
3/4 cup white sugar
2 Tablespoons lemon juice
1-2 teaspoons lemon zest (or more if you want more lemon flavor)
2 teaspoons vanilla
2 eggs
1/2 cup low fat lemon yogurt (soy yogurt works fine, but make sure it is gf)
1 1/2 teaspoons xanthan gum (you can add more if you wish, but this was enough for me)
1 1/2 teaspoons baking soda
3/4 teaspoon salt
1 stick of melted butter, cooled slightly
3 medium bananas, mashed
DIRECTIONS:
There is no need for a mixer for this recipe. You will need a very large greased loaf pan- 10×5. In a med. bowl, sift all the dry ingredients together. In a separate bowl, mix together the mashed bananas, vanilla, whisked eggs, yogurt, lemon juice, lemon zest, and butter. Add the liquid ingredients to the dry ingredients and mix until moistened. Pour into prepared pan and bake at 350 degrees for 1 hour and 10 minutes or until cake tester comes out clean. I use a bamboo skewer to ensure that the entire loaf is cooked through. There is nothing worse than cutting into banana bread and realizing that it did not cook long enough.
Makes one 10×5 loaf of banana bread
If you liked this post, please Stumble it! or Add to Del.icio.us.
Posted by Natalie
Filed under: Quick Bread Recipes | 22 Comments »
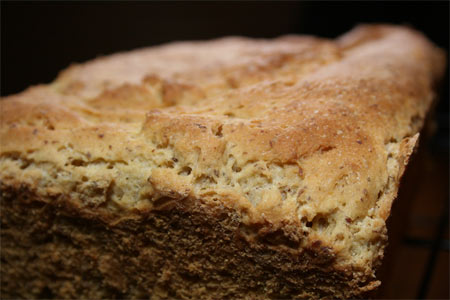
For years after going gluten free I avoided bread. I was almost too embarrassed to admit to readers that I just didn’t have a gluten free bread recipe. I went completely without bread until we moved to Raleigh. It was here that I discovered Whole Foods Bakehouse Gluten Free Sandwich Bread. For a long time, I really liked it. You kinda had to at $4.99 a loaf. Then one day I decided I couldn’t stand it anymore and decided that I had to make my own gluten free bread. I received a gluten free bread machine for Christmas from my mother (here it is at Amazon) and was determined to create my very own gluten free loaf. Well the fact is I am intimidated by the machine. It is still on my counter in all its glory waiting to be used. My mistake was reading the comments under the great post, First Loaf in my Gluten Free Bread Machine at Karina’s Kitchen. I thought making bread in a bread machine would be easier rather than harder. I am sure it can be, but I decided after reading all those complicated “do’s” and “don’ts” about making gluten free bread in a bread machine that I wanted to bake a loaf of gluten free bread in the oven first. So I had a plan but I needed a recipe. There were some beautiful gluten-free loaves out there. My problem was that sandwich bread really should be tailored to your specific tastes and dietary preferences. I wanted a loaf that did not have cornstarch or bean flour in it. I also wanted my gluten free bread recipe to feature at least three whole grain flours. This is what I came up with- and I truly understand why everyone’s gluten free bread posts have the words ‘finally’, ‘cry’, and ‘at last’ in them! This recipe is a staple so I can’t guarantee that it won’t change with time, so if you try the bread please leave suggestions, tips, and alterations for me to learn from as well. This is the best gluten-free bread I have had and that is why I am posting the recipe. The best part of this bread is the flavor and texture. The big con of this recipe may be the expense of the ingredients (i.e. certified gluten free oat flour, etc). I am sure there are less expensive gluten free flours you could use out there. It is still less expensive than buying a loaf though!!!

GLUTEN FREE MILLET OATMEAL BREAD RECIPE
1 cup brown rice flour
1/2 cup certified gluten free oat flour (you can pulverize oats in a food processor to make oat flour) *If you are sensitive to oat flour, try quinoa flour
3/4 cup millet flour
1/2 cup tapioca flour
1/3 cup arrowroot starch* you can substitute cornstarch if you need to
1/3 cup sweet rice flour
1/4 flax seed meal (you can’t taste it and it adds fiber)
1 Tablespoon xanthan gum
3 eggs
1 tsp apple cider vinegar
1 packet active dry yeast+ 1 tsp granulated sugar for proofing yeast
1 Tablespoon molasses
3 Tablespoons brown sugar
1 1/2 teaspoons salt
4 Tablespoons butter or butter substitute, melted
1/4 cup plus 1 cup heated water (I heated my water to 120 degrees to proof the yeast)
DIRECTIONS:
Make sure all your dry ingredients (and eggs!) are at room temperature. Grease the bottom of a 10 inch loaf pan or two 8 inch pans. Heat the oven to 200 degrees and then turn off. In the bowl of your stand mixer (I used my paddle not my dough hook for this recipe), sift together the dry ingredients. In a separate medium bowl, mix eggs, molasses, vinegar, and melted butter together. Heat your water for proofing the yeast. I recommend 120 degrees. In a small prep bowl, stir together your active dry yeast and one teaspoon of sugar. Add 1/4 cup of the heated water to the yeast mixture. Let the yeast sit for 10 minutes. It should be foamy and active! If not, start over with another packet of yeast. Once your yeast is ready, add the egg mixture to the dry ingredients. Then add the yeast mixture. Then slowly add your water (should still be warm) to achieve the right consistency in your batter. Since different brands, flours, measuring techniques act different I do not recommend just blindly dumping in the rest of the water but adding gradually instead. The dough should be like very stiff cake batter. I beat my dough on high for about 15 minutes in my stand mixer. If you accidentally add too much water simply add a little rice flour until you achieve the dough consistency you are after. Put the dough in your prepared pan and place in oven to rise for about 1 - 1 1/2 hours. You can put plastic wrap or a towel over the pan. My house is much too cold right now so I put mine in the oven so that the dough can rise. Once the dough has risen to the top of the pan, bake the bread for 40 minutes at 350 degrees or until internal temperature reaches 190 degrees. As you can tell, I am big on thermometers.
Makes a delicious loaf of bread that is eaten in no time. My bread is always consumed within 2 days so I don’t know how long it lasts. I would not refrigerate this bread ( it might get soggy), but I would slice and freeze it for later use.
Notable Helpful Links to this post:
Gluti Girls- Go here to see how she made this gluten free bread in a bread machine.
Gluten Free Gobsmacked- Kate made this bread here using quinoa flour and agave nectar and has suggestions about pan size substitutions.
This recipe is dedicated to Jennefer who asked for a gluten free oatmeal sandwich bread. I hope this recipe leads you closer to that perfect slice of gluten-free bread!
Check out my other gluten free bread recipe with 25 bread baking tips!
If you liked this post, please Stumble it! or Add to Del.icio.us.
Posted by Natalie
Filed under: Bread Recipes | 98 Comments »

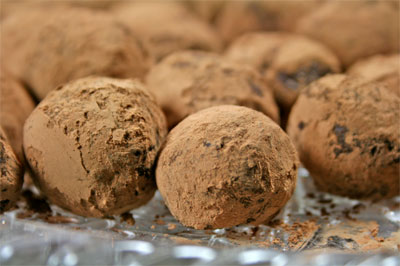
I made chocolate truffles for my sweetheart tonight. He loves my fudge recipe, so I thought he might dig these truffles too. I always thought making truffles was hard, but it doesn’t have to be! Making truffles is actually very easy. And rolling the truffles is awesomely messy. It reminded me of making mudpies as a kid. My hands were so dirty! The kitchen hand soap dispenser looked like it had been attacked by chocolate by the end of the project. Anyway, in case you would like to make chocolate truffles for your sweetheart I thought I would post the recipe.
CHOCOLATE TRUFFLES
2 Tablespoons of butter
1 cup heavy whipping cream
16 oz. bittersweet chocolate (for a more kid-friendly taste, try semi-sweet chocolate)
2 teaspoons of your favorite flavoring or liqueur (Grand Marnier, Frangelico, etc), optional
DIRECTIONS:
In a medium non-stick saucepan, heat the cream and butter over med.-low heat. It is not necessary to scald pasteurized milk, so I heated my cream and butter to 150 degrees or until small bubbles formed at the sides of the pan.
In the meantime, place your chopped chocolate in the top of your double boiler. Don’t forget to fill the bottom of your double boiler with water. Place the double boiler over low heat. If you don’t own a double boiler, you can improvise with a saucepan and a bowl.
Once the chocolate is shiny, stir until smooth. Slowly add heated cream. Mix until smooth. If desired, add your custom flavorings.
Remove top portion of the double boiler and allow it to cool on a rack for one hour or until room temperature. Refrigerate for four hours or until set.
Once the ganache has set, you will need to scoop the chocolate and roll it into balls. Pour cocoa (or garnish of choice) on to a large plate for rolling the truffles. I used a 1/2 T scoop but you may wish to go smaller and use a teaspoon or a melon baller.
After you have rolled the truffle into a ball, roll the truffle in cocoa powder and set aside.
After you are finished rolling the truffles, return them to the refrigerator for storage. Allow them to set for several hours or overnight.
Makes about 36 truffles.
Variations: You can roll the truffles in hazelnuts (good if using Frangelico), roll in coconut, roll in sprinkles, or dip in chocolate for a crunchy coating. I don’t like my truffles very sweet so I simply roll mine in cocoa powder and eat them with a nice cappuccino. Make these your own! Have fun with it!
This recipe is truly easy! If you are interested in step-by-step photos of making this recipe, I wrote a guest post at Gluten Free Cooking School, How to Make Chocolate Truffles here.
If you liked this post, please Stumble it! or Add to Del.icio.us.
Posted by Natalie
Filed under: Candy Recipes, Chocolate | 14 Comments »
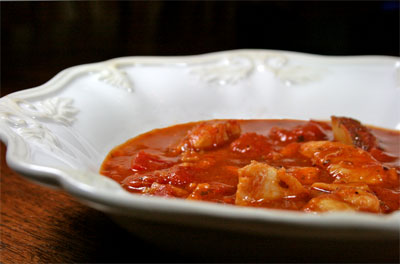
Today was the first Friday of the Lenten season. Since a church fish-fry is clearly out for my gluten-free family, we stayed home and ate a more healthy gluten-free fish stew instead. I hesitated to even post this recipe because I am so bad about writing down/remembering how I make a stew. In my world, stews don’t have exact recipes. I just taste and add and then taste and add again. I forced myself to write down this stew recipe tonight so that I could post it in honor of the beginning of Lent. Enjoy! Make it your own!
FISH STEW
2/3 cup of white wine
1 can of Muir Glen diced tomatoes with juice
1 can of tomato paste
3/4 cup of water (reserve some and add gradually, you may not need this much water)
1.5 lbs of white fish (cod, halibut, etc)
1 cup of clam juice or leftover gluten-free clam sauce (if using a garlicky clam sauce that includes wine and garlic already omit the wine and garlic called for in the recipe or use sparingly)
4 or 5 red potatoes, chopped (I left the skin on)
olive oil (maybe 4-5 Tablespoons)
sprinkle of sea salt for potatoes
1/2 cup of onion, chopped
2 cloves garlic (if using clam juice, you may not wish to add this if you are going the clam sauce route)
1-2 teaspoons of Frank’s Hot Sauce (ok, so I put WAY more than that, but start with this and add more)
1 bay leaf
1/4 cup parsley, chopped
1/4 teaspoon paprika
1/2 teaspoon of salt
1/4 teaspoon freshly ground pepper
1/4 teaspoon basil
1/4 teaspoon oregano
Variations: This fish stew would be good with celery or any number of vegetables.
Directions:
Cut your fish in 2 inch pieces and place in dutch oven. Sprinkle salt, pepper, basil, oregano, and paprika over the fish pieces. Pour in the wine, diced tomatoes, some of the water, and stir in the tomato paste. I added my tomato paste and water gradually to my taste preference- you may wish to add more or less. In a skillet, heat the olive oil over med. heat. Add 1/2 cup onion and chopped potato pieces. Sprinkle the potatoes with sea salt. Once the onion is tender add your minced garlic and cook for about 30-45 seconds- combine well. Add potato mixture and parsley to the fish mixture in the dutch oven. Cook for 10-15 minutes until both the fish and potatoes are tender. Remove your bay leaf. Taste taste the soup. If it needs the remaining water, more hot sauce, more flavor- add it! Serve piping hot with gluten free bread. I made an oatmeal bread (first time!) to serve with it.
Serve about 4.
My husband and I both thought this stew tasted even better the next day.
If you liked this post, please Stumble it! or Add to Del.icio.us.
Posted by Natalie
Filed under: Fish Recipes | 6 Comments »


 I am
I am  I am
I am  I am
I am