My sister brought this naturally gluten-free cake (no flour) over yesterday to cheer me up. She joked that she brought me a “lighter than air” chocolate cake in hopes that I would feel lighter than air instead of nine months pregnant. HILARIOUS. It is an awesome recipe and it did make me feel better! I will be making this cake for years to come because it was that good!

LIGHTER THAN AIR CHOCOLATE CAKE
For cake layers:
12 oz fine-quality bittersweet chocolate (not unsweetened), chopped
6 tablespoons water
12 large eggs, separated, at room temperature
1 1/3 cup sugar
½ teaspoon salt
2 tablespoons Dutch-processed unsweetened cocoa powder
For filling:
2 cups heavy cream
6 tablespoons confectioners sugar, sifted
4 tablespoons Grand Marnier*
* My sister substituted 4 tablespoons cocoa and 1 teaspoon vanilla since she did not have the Grand Marnier with excellent results!

DIRECTIONS:
To Make cake layers: Preheat oven to 350°F. Grease four 9-inch circular cake pans and line bottoms of circles with a piece of parchment paper.
Melt chocolate with water in a small heavy saucepan over very low heat, stirring. Cool to lukewarm.
In your stand mixer, beat yolks, 2/3 cup sugar, and salt until thick and pale for about 5 minutes. Stir in melted chocolate until combined. In a separate HUGE bowl, beat 12 egg whites until they hold stiff peaks (clean your beaters). I use hand held mixer with a very large stainless steel bowl for this-
Add remaining sugar and beat until whites just hold stiff peaks. Fold one third of whites into melted-chocolate mixture, then fold in remaining whites carefully.
Spread batter evenly over four baking pans. Bake until the cake has puffed and the top is dry to the touch, maybe 16 minutes. I rotated my cake pans once to ensure they cooked evenly. Once the cake is done, cool the cake pans on cooling racks for about 10 minutes.
If you wish, sift cocoa powder over top of cake layers. Then place a piece of waxed paper over the top of the cake pans. Place a cookie sheet over paper and invert cake onto it, gently peeling off wax paper lining. For best results, place all of the layers in the freezer for at least 2 hours or until they are firm enough to be carefully lifted without breaking.
In order to make the filling: In a clean large bowl, beat cream with powdered sugar and Grand Marnier (or cocoa powder) until it just holds stiff peaks.
To assemble the cake:
Bring first cake layer out of the freezer (leave the others in the freezer until you are ready for them) and arrange on your cake plate, cocoa side down. Spread 1/4 of filling evenly over the cake layer. Bring the next cake layer out of the freezer, placing it gently over the filling, again cocoa side down. Repeat until the cake is assembled!
Keep cake in the refrigerator until serving time. The cake layers should thaw after about 2-3 hours of being in the refrigerator and the cake will be ready to serve.
Dark chocolate grated into curls with a vegetable peeler makes for an excellent garnish. OR writing out the word ‘BABY’ with gluten-free chocolate chips is awesome too.
If you liked this post, please Stumble it! or Add to Del.icio.us.
Posted by Natalie
Filed under: Baked Goods, Cake Recipes, Cakes, Chocolate, Desserts, Gluten Free, Holidays, Pregnancy | 31 Comments »
I woke up this morning in the most energized, happy mood! I think the first time I have sat down today has been to write this blog entry. Jude and I went to the Art Museum today to go see the Photo Exhibit. Jude was more interested in his echo than the artwork in the gallery, but I enjoyed the exhibit very much. After we finished looking at the exhibit, we ate lunch outside. The breeze was wonderful today and we ended up playing for at least two hours outside the museum. When I came home, my sister called to make sure I had not gone into labor without her. I get checked on by relatives a lot these days! They are just making sure I am still pregnant and they did not get deleted from the all-important call list.
So, yes, I am still very, very pregnant!
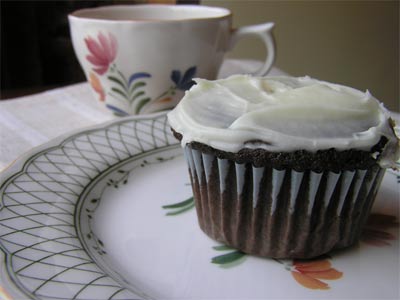
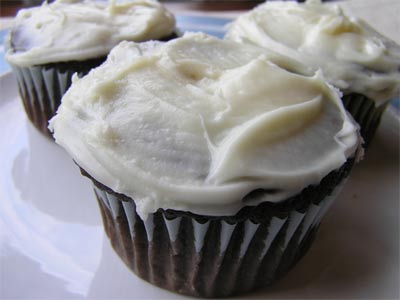
One of the things I have been doing to keep myself excited about the baby is to read birth stories. Some of these birth stories read like spoofs or satires of the entire labor/birth process. When contractions are described as “surges” I just have to laugh out loud. Birthday cakes for the new arrival are mentioned in a lot of the birth stories. When I was in the hospital with Jude, all I got was a plain baked potato and some stringy, plain chicken….YUCK! So, gluten-free birthday cake sounds like a fantastic idea. While I was on the phone with my sister, I ordered a special gluten-free birthday cake that she is supposed to make at a moment’s notice. [haha] To tide myself over, I made very merry un-birthday cupcakes tonight after dinner. Like I said, I have an insane amount of energy today that has to be channeled somewhere. I just made cupcakes the other day, but tonight’s cupcakes are the traditional slathered-with-frosting birthday kind! Maybe it will inspire the little one to make its debut!
These cupcakes are an adaptation of a cupcake recipe from Mary Engelbreit’s cookbook, Mary Engelbreit’s Sweet Treats Dessert Cookbook

DEVIL’S FOOD CUPCAKES
3/4 cup rice flour
1/2 cup sorghum flour
1/2 cup tapioca flour
3/4 teaspoon of xanthan gum
2/3 cup unsweetened cocoa powder
1 1/2 teaspoons of baking soda
1/4 teaspoon of salt
1/2 cup of unsalted butter (1 stick) at room temperature
1 1/2 teaspoons of vanilla
1 1/3 cups of buttermilk
1 1/2 cups of sugar
2 eggs at room temperature
Favorite Gluten Free Frosting

Directions: Preheat the oven to 350 degrees. Line 20 muffin tins with liners. In a med. bowl, whisk the flours, xanthan gum, cocoa, salt, and baking soda together. In a large bowl or in your stand mixer, beat the butter and sugar together until light and fluffy. Add the eggs one at a time, beating well after each addition. Beat in the vanilla. Slowly add the buttermilk and the flour mixture alternately until combined. Spoon batter into muffin tins, filling each 2/3 full. Bake the cupcakes for about 17 minutes. Cool on wire racks. Frost after the cupcakes have cooled completely.
If you liked this post, please Stumble it! or Add to Del.icio.us.
Posted by Natalie
Filed under: Baked Goods, Celiac, Desserts, Gluten Free, Holidays, Pregnancy | 12 Comments »
I found this recipe while thumbing through an old issue (August 2005) of Cooking Light. I adapted it to be gluten-free and here are the results! I enjoyed this cookie very much and I am looking forward to other iterations where I can play with the recipe a little bit. I think there are a variety of flavors that could be added to this recipe. Let me know what you come up with!

CHEWY CHOCOLATE-COCONUT MACAROONS
2 oz. unsweetened chocolate, chopped
6 tablespoons rice flour
2 tablespoons tapioca flour
1/4 teaspoon xanthan gum
2 tablespoons unsweetened cocoa
1/8 teaspoon salt
2 1/2 cups sweetened flaked coconut
1 teaspoon vanilla extract
1 14 oz. can sweetened condensed milk (orig. recipe called for fat-free, but I used reg.)
Directions:
Preheat oven to 250 degrees. Grease or line a cookie sheet with parchment paper. Melt unsweetened chocolate in the microwave for about a minute or until almost melted and set aside. In a large bowl, combine the flours, xanthan gum, cocoa, and salt. Add coconut and mix well. Stir in melted chocolate, vanilla, and condensed milk. The mixture will be stiff. Drop in level tablespoonfuls 2 inches apart. Bake at 250 degrees for 35 minutes or until the edges of the cookies are firm and the center is soft.
Makes about 2 1/2 -3 dozen cookies
One of my readers, Michelle, alerted me that these macaroons can be made casein-free. For a casein-free version, try making condensed coconut milk- Go visit Alex, of Stir of the Moment to find out how to make condensed coconut milk. It is hidden in his Nirvana bar post so make sure to read it through. And of course, you would need to use casein-free chocolate as well.
If you liked this post, please Stumble it! or Add to Del.icio.us.
Posted by Natalie
Filed under: Baked Goods, Celiac, Chocolate, Cookies, Desserts, Egg-free, Gluten Free, Holidays | 10 Comments »
I have really been slowing down in these last days of pregnancy. I am cooking fast, easy meals that do not require much thought, energy, and time. My computer is also broken, so I am using my husband’s computer when he is not working. I am hoping my computer can be fixed! On the mommy front, my toddler has started walking! Yay! I have been extra busy running after him. I am really happy that he is walking now because both Jude and I were both starting to get frustrated. The poor kid just did not want to fall. I am sure he will be a pro by the end of this week. The other good news is that Jude is starting to grasp the concept of cleaning up. I thought it would be months before this occurred to him. The first thing he did was try and help me fold the laundry and put in on the pile I was working on- normally, he just gleefully throws everything on the floor that I have just folded and put in piles to put away. Later that day, I asked him to please put back all of the placemats he had just taken out of the basket. I really thought I was just practicing my mommy voice, but he scampered back and started putting the placemats back in the basket. Unbelievable. I guess you never know when something is just going to click!

ITALIAN SAUSAGE SPAGHETTI
I made Italian Sausage Spaghetti tonight with Tinkyada pasta. My husband and I really enjoy pasta now. He never really enjoyed it before because he always felt sick and too full after eating pasta too- and he doesn’t have a gluten intolerance! I browned some gluten-free Italian sausage, made my marinara sauce, and threw it over the Tinkyada spaghetti. Voila! If only every night were that easy.
If you liked this post, please Stumble it! or Add to Del.icio.us.
Posted by Natalie
Filed under: Celiac, Dinner, Easy, Gluten Free, Italian, Pasta, Pregnancy | 11 Comments »
I have been spending a lot of time running after my toddler outside and less time in the kitchen! The weather here is gorgeous and Jude wants to spend all day outdoors. Who could blame him? Today we were outside making mudpies together. He got completely covered in mud from head to toe- he even tried some of his creation, but decided he didn’t really like mudpies after all. It is going to be a fun summer. I love having a little boy. Even boys that kick and scream when it is time to come in for dinner. I am pretty sure that I did that to my mother too.

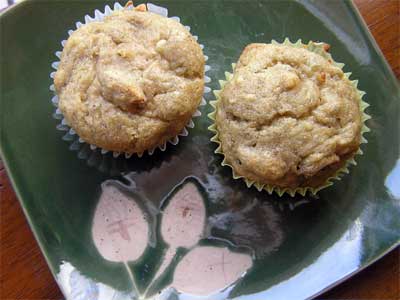
BANANA NUT MUFFINS
Oh, and I did make something great this week! I made yummy Banana Nut Muffins. I had trouble coming up with a winning recipe for some reason. The problem was I did not have a tried and true gluten version of banana nut muffins of my own or one to convert. I tried a number of recipes, but they all turned out too sweet or too dry or too something. When I was tired of fooling around, I went to Simply Recipes and found a wonderful recipe for Banana Nut Muffins. They are wonderful! In order to make the muffins gluten-free, I substituted 1/2 cup each of rice flour, 1/2 cup of sorghum flour, and 1/2 cup of tapioca flour and added 3/4 teaspoon of xanthan gum. I sifted the flours and the xanthan gum together before adding the flour mixture to the wet ingredients. Reminder: watch the cooking time- my muffins were done between 20-22 minutes. These muffins freeze beautifully.
If you liked this post, please Stumble it! or Add to Del.icio.us.
Posted by Natalie
Filed under: Baked Goods, Breakfast, Celiac, Gluten Free, Muffins | 3 Comments »


 I am
I am  I am
I am  I am
I am